Hello everyone. I haven't posted anything for a long time. Yes, I know ya'll already realize that, but for the past several months I have spent so much time on the computer at work that I just haven't wanted to get on it when I come home. PLUS I've been having computer problems. The problem has been fixed, YEA! So
on to better things--I haven't been crafting much, but this weekend I had a sudden desire to have all my earrings in a place where the pairs would be easier to find. So, I started thinking about what I needed to do to get my earrings organized.
This was ok for awhile but I got tired of dumping them out on the dresser to find the matching earrings I wanted to wear that day. What I wanted was something easy not complicated. Something I could do over the weekend. Well, it finally hit me what I needed.
Here's what I came up with. As stated nothing complicated but easy! I'm not sure if I had seen something similar in someone's blog or not, but if I did I cannot remember whose it was or I would give them credit.
Scrapbook paper, 8x10 picture frame and some plastic craft mesh--hey that's what I call it. What it's really called, well your guess is as good as mine! I found it in the craft section of Walmart. I spray painted the picture frame with some black spray paint I already had on hand. Started to paint it orange and glaze it with a brown glaze, but decided black would do. As for getting the paper onto the plastic mesh lets just say modge podge did not work for me so I ended up taping the edges. People won't see the edges so figured that would work ok. I then took a long hat pin I had and poked each little square in the mesh from the backside where I wanted to hang an earring. Easy-peasy! Here's the finished results.
Probably should have used a bigger frame, but this will do. Now I know at a glance which pair to get!! It was fun to make. Could have had it finished in a day, but this weekend was cool and it took about 12 hours for one coat to dry. Be glad when it warms up some so I can really get my crafting mojo on and paint will dry fast.
Ya'll have a blessed week!
Sunday, February 26, 2012
Friday, November 11, 2011
AWESOME FIND
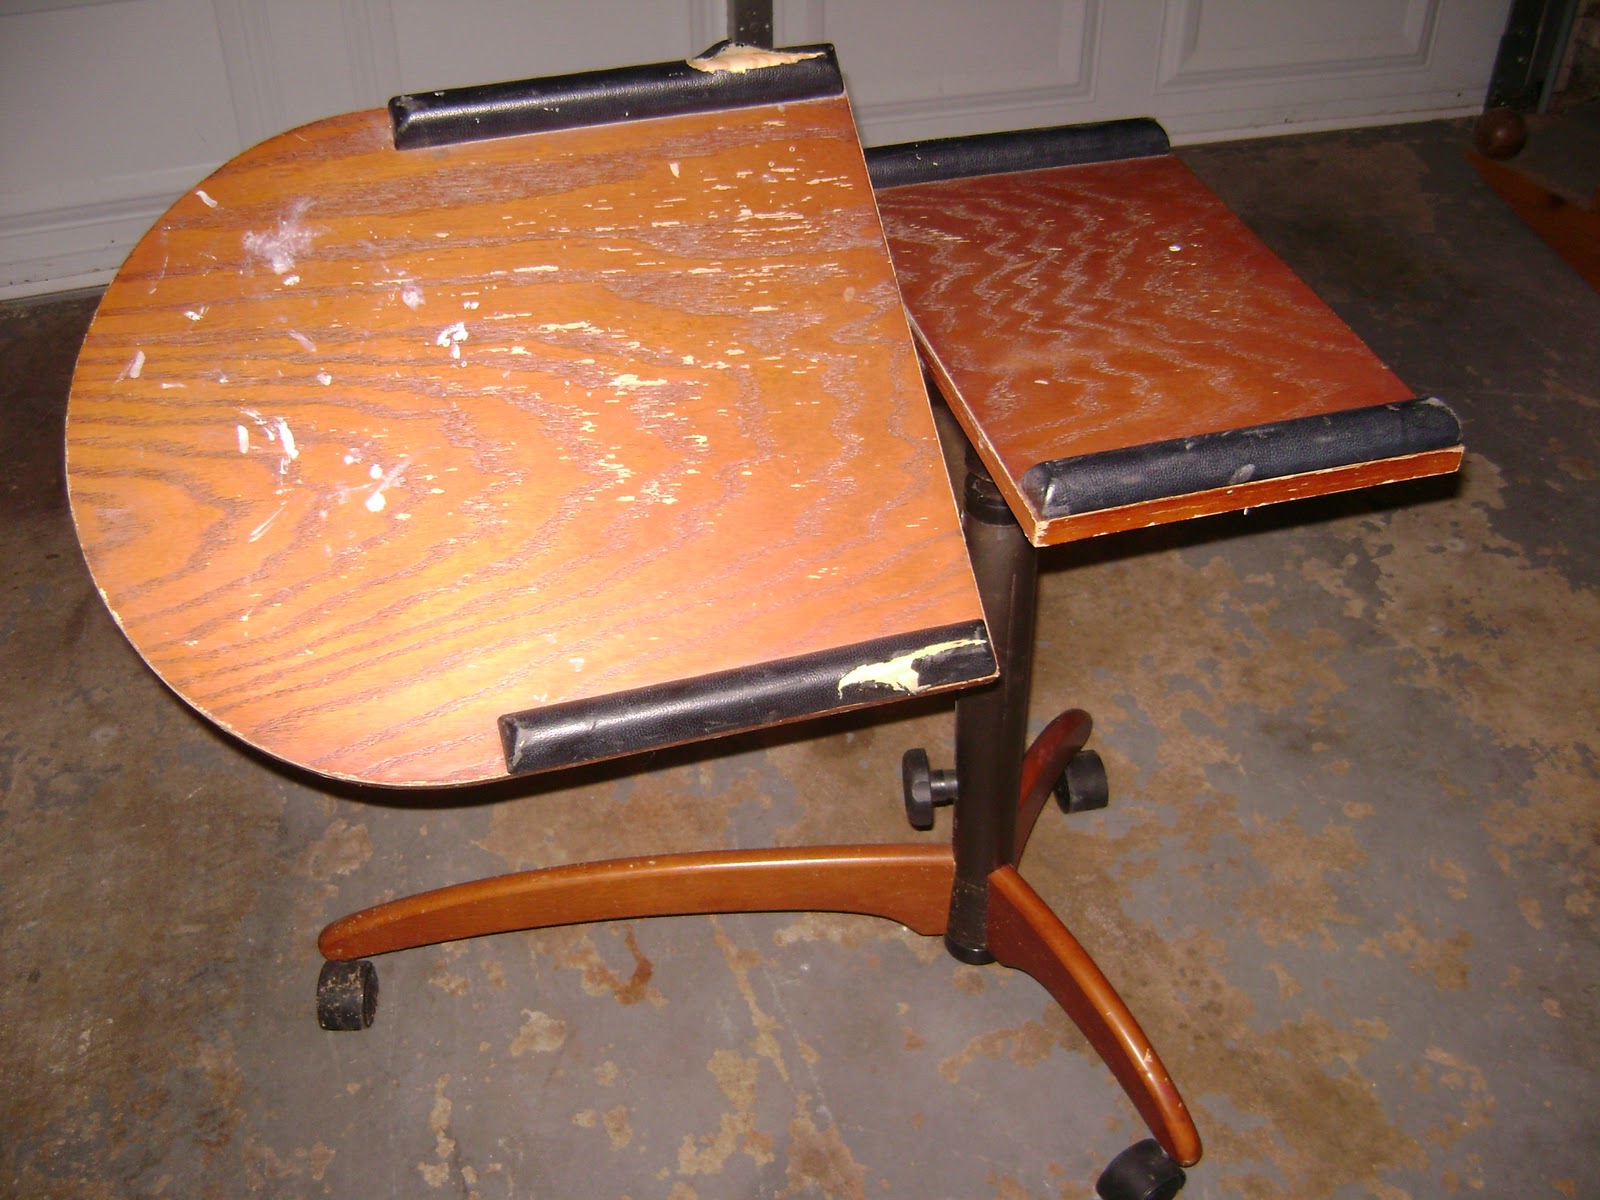
I just love finding something unexpected. As I was cruising down my regular route to work I spotted this little gem flipped upside down on a couple of plastic barrels. I had passed it up before I fully realized what it was. I did a quick turn around and went back to take a look at it.
With a little loving care this gem can be made to look awesome. It's the perfect craft table for me! The nice thing about it is that it can be raised up to a higher position than what the picture is showing it to be in.
It tilts to the left or right. The rollers are in excellent shape. Can't wait to get to this little gem and work on it but, "alas" there are other items ahead of it that I need to redo.
This picture shows the rod that lifts it up and down. It's made of real wood and the metal is gray black color. As you can see Prince had to check it out.
When I start work on it I'll try to remember to take in progress pictures so you can see what all was done to bring out the beauty of this little gem.
Thanks for dropping by my blog! Ya'll have a blessed and joyous weekend.
With a little loving care this gem can be made to look awesome. It's the perfect craft table for me! The nice thing about it is that it can be raised up to a higher position than what the picture is showing it to be in.
It tilts to the left or right. The rollers are in excellent shape. Can't wait to get to this little gem and work on it but, "alas" there are other items ahead of it that I need to redo.
This picture shows the rod that lifts it up and down. It's made of real wood and the metal is gray black color. As you can see Prince had to check it out.
When I start work on it I'll try to remember to take in progress pictures so you can see what all was done to bring out the beauty of this little gem.
Thanks for dropping by my blog! Ya'll have a blessed and joyous weekend.
Wednesday, November 9, 2011
Drawer Bookshelves
Finally I have book drawers to put all my books in!! Yea! My new book shelf is made out of three dresser drawers. I had gone out on free cycle and put a message in to see if anyone had an old dresser that was falling apart but the drawers were o.k. I got a answer back and went to check it out. The awesomeness about the drawers were they are made out of real wood not the cheap particle board most dressers are made out of today!! SCORE big time for me!. My original idea was to make two of the drawers into an end table, but the more I thought about it the more I realized they would be perfect for all those books I had lying on the floor in my hall. There is already a small bookshelf there with all my novels that I keep and read at least once every year. The books on the floor next to this shelf were either children's books I did not want to get rid of, some Christian books on different subjects and a few old Harlequin I had kept.
I did not think to take a picture of the drawers before I set them up, so you'll just get to see the end results. This is by no ways a finished project. I've got to decide which color I want to paint them and the book shelf. I'm thinking about a deep garnet red color that is in the pattern on my sofa bed. Not sure but I'm going to think about it for a bit before I make a decision.
The nice thing is when I set two of the drawers next to the bookshelf it filled the space perfectly between my bookshelf and the trim on the door to one of my bedrooms. Here let me show you what I mean.
You can see the bookshelf in the lower right hand corner. As stated the drawers are a perfect fit between it and the trim on the door. YEA!! One of the drawers had the face plate (that's what I call it) already off, so I decided to pull the plate off a second drawer. That way the 3rd drawer could sit on top of the two without any problem. Let me tell you I had a time pulling staples out of both of the drawers on the bottom. Oh, there were nails that I also pulled out. Let's just say my right arm and thumbs on both hands are sore from pulling to get those crazy staples and nails out.
Here's a picture of the "plate" I pulled off.
I figure I can put it to good use for something!!
Here's another view of the book shelf.
It may seem crazy to have book shelves in the hall, but my home is only 1200 sq foot of living space about 1500 sq foot including the garage. My living room is small so I was unable to include bookshelves in the living room. I figured why not the hall. It's only me and my dog who live there with the occasional family visits so it's no big deal. There's still plenty of space to walk down the hall even with the bookshelves in there. Here's why I say that.
This is looking from my dining room to the hall. Right behind the chair is the wall so there is open space the entire length of the book shelves/cases whatever you want to call them.
Hope you enjoyed my seeing my new drawer bookshelf. When I paint the drawers and book shelf I will take a picture so you can see the completed results.
Have a blessed week!
I did not think to take a picture of the drawers before I set them up, so you'll just get to see the end results. This is by no ways a finished project. I've got to decide which color I want to paint them and the book shelf. I'm thinking about a deep garnet red color that is in the pattern on my sofa bed. Not sure but I'm going to think about it for a bit before I make a decision.
The nice thing is when I set two of the drawers next to the bookshelf it filled the space perfectly between my bookshelf and the trim on the door to one of my bedrooms. Here let me show you what I mean.
You can see the bookshelf in the lower right hand corner. As stated the drawers are a perfect fit between it and the trim on the door. YEA!! One of the drawers had the face plate (that's what I call it) already off, so I decided to pull the plate off a second drawer. That way the 3rd drawer could sit on top of the two without any problem. Let me tell you I had a time pulling staples out of both of the drawers on the bottom. Oh, there were nails that I also pulled out. Let's just say my right arm and thumbs on both hands are sore from pulling to get those crazy staples and nails out.
Here's a picture of the "plate" I pulled off.
I figure I can put it to good use for something!!
Here's another view of the book shelf.
It may seem crazy to have book shelves in the hall, but my home is only 1200 sq foot of living space about 1500 sq foot including the garage. My living room is small so I was unable to include bookshelves in the living room. I figured why not the hall. It's only me and my dog who live there with the occasional family visits so it's no big deal. There's still plenty of space to walk down the hall even with the bookshelves in there. Here's why I say that.
This is looking from my dining room to the hall. Right behind the chair is the wall so there is open space the entire length of the book shelves/cases whatever you want to call them.
Hope you enjoyed my seeing my new drawer bookshelf. When I paint the drawers and book shelf I will take a picture so you can see the completed results.
Have a blessed week!
Subscribe to:
Posts (Atom)